Showing posts with label Projects. Show all posts

Wednesday, July 6, 2011

Done and Done

The baby quilt is FINALLY done!
Nevermind the fact that I started this sometime back in March of this year.
This is my very first quilting project ever and even though my mom/expert quilter extraordinaire coached me along through many many phone calls and emails, I am proud to say I did it all by myself.


Here she is in all her glory.
The nursery was originally planned to be all white (because I'm crazy like that) but when I found these fabrics for the quilt, I was inspired and that's where all the color in the nursery came from.


Binding this sucker gave me blisters.  I did not expect to have to hand sew to finish this thing!  (I hate hand sewing)  But one of my favorite parts of this pattern is the prairie points along the interior border.  Even though I hated sewing those too.


Her lovely backside.

Now I can proudly say my pile of unfinished projects is rapidly depleting.

Saturday, June 25, 2011

A Very Sad Living Room: Part II

Once upon a time I went to the D.I. on my lunch break and returned to work with this darling table!  She was $10 and I tried to barter for a lower price because the top is coming loose, but when they wouldn't budge on the price I knew I had to have it anyway.  You can't tell at all from this terrible picture, but the wood was in sad shape.  It was badly stained and scratched up and I probably could/should have worked hard to restore it to its natural wood beauty...


But I decided to paint it white instead :)
Kyle is always pointing out how I am obsessed with white... probably he is right.
My little table is currently serving as an end table in the not-as-sad-as-it-once-was living room.


I'm no furniture expert, but I'm thinking it was hand carved because there are a lot of irregularities in the details.  And that is what I love about it.  I'm guessing somewhere there is an antiques or furniture guru cursing me for painting over this thing.  Oops.


And here is another sad corner of the house, which is pretty much part of the living room.  The entry way needed help in a bad way.  (The little table was sitting underneath those pictures... still not sure what to do about that right now)


So one day we found the mirror/coat rack thing at a yard sale for $5 and the next week I fell in love with this handmade bench I bargained for $13 (they wanted $17).  The bench looks kind of like something someone made in a 7th grade wood shop class.  But that is why I love it.  The curves at the top aren't perfect and the slats on the seat are wonky.  Kind of like me, if you know what I mean ;)  I especially like how our shoes are slightly less visible tucked under the bench now. 


Here's a view of our not-as-sad-as-it-once-was living room from the front door.  I finally decided on hanging some stuff on the walls and our IKEA money tree is thriving in its new corner.  As I mentioned yesterday, the plan is to sew up slipcovers for the love seat and wing back chairs.  Probably in white (I mean, if I'm going to have an obsession, I might as well do it right, right?)

We're going for a green, white, black and navy theme in here.
Or at least until I change my mind again.

Also I think that floor lamp needs to go...

Friday, June 24, 2011

A Very Sad Living Room

Our living room was having an identity crisis.
I couldn't figure out what to hang where, how I wanted things arranged, and the chairs and sofa are two different color blues.


And then there was the corner shelf.
Over a year ago I attempted to lug this thing home on the roof of my little Toyota.  It subsequently fell off at an intersection, denting the trunk, and hurting my precious feelings.  After I'll we've been through together, this shelf is never leaving me.  Buuut I didn't so much love the oak.  Especially since there's also asphalt marks on the back sides now.  Oops!


I grabbed a quart of Lily Pad by Martha Stewart and had it matched in Glidden.


I painted all of the interior in the Lily Pad green and did the outer trim and back in some spare cream high gloss paint I had on hand.


And now I have a home for all my milk glass!  I love having a place to put my favorite collection.  Kyle was a little nauseated at how much milk glass I've aquired, but I still have no intention of quitting :) 

Now that I've had this corner shelf done for a few weeks though, I'm now contemplating adding a stenciled background to it... you know, just for fun.

So little by little this once very sad living room is coming together.  There's still a few big projects left to work in here (namely new slipcovers) but I'll share some of the other things we changed so far a little later.

Friday, June 17, 2011

Oh is it Friday? I had no idea.

Today is probably the best I've felt in over a month.  To celebrate, I dragged my sorry butt to my sewing room and finished up a couple of nursery projects.  After all, the clock is ticking and this baby is going to be here before I know it.  (Although that clock could tick just a little faster, if you ask me)

I finally fancied up the little lampshade for my beloved milk glass lamp.
With ruffles!


To make the shade, I ripped 2 inch strips of plain white muslin, ruffled each strip and hot glued them onto my yard sale shade.  This was much easier and faster than the coffee filter shade I attempted for the floor lamp not too long ago...  that is still hanging out, unfinished, in the sewing room (aka failed project storage).


And then I dug through some fabric scraps from the baby quilt (which is still not quite finished...  noticing a theme here?) and made some mini buntings!  When the rest of the room is ready, I'll show you where I decided to hang them.

Wednesday, June 1, 2011

Project Breakdown

We had been talking about painting the kitchen cabinets since about the time we moved in last April. 
I was hesitant to go for it for two main reasons: 
1. Money
2.  It looked like a heckuva lot of work (and it was) 

So in review, I just wanted to do a little cost breakdown of the big kitchen project to prove that it doesn't take a lot of money to make a big impact.

1 gallon Zinsser primer: $19
1 gallon Behr Premium Plus high gloss paint (Bleached Linen) with $5 rebate: $25
1 super fancy Purdy 1 1/2" brush for latex paint: $11
6 4" foam roller covers: $15
Medium grit sandpaper: $10
12 IKEA knobs: $24

Other supplies we used that we already had on hand:
1 roll painter's tape
2 4" paint rollers
2 paint trays
4 paint tray liners
drop cloths (or in our case a lot of old sheets)
Not so fancy paint brushes for priming

Grand Total: $104

Tuesday, May 31, 2011

Biggest Project Ever: Kitchen Makeover!

Well, we FINALLY did it. 

We painted our kitchen cabinets white!
This is the biggest project we've tackled yet and now I kind of feel like we can do anything. 

And let me just say I think I deserve some kind of an award for doing this all while 7 months pregnant.  I mean, how ridiculous is that?!  I probably have a screw loose or something.

Kyle also deserves an award for putting up with a crazy wife during this project.  I may or may not have become a bossy control freak maniac during some of the process.  {sorry, babe}  And he also made dinner each of the 4 nights our kitchen was torn apart.  And did all the dirty work (like scrubbing out the under sink cabinet that had suffered major leakage and molded and the previous owners covered it up). 

So just in case you are also 7 months pregnant (or not) and would like to transform your cabinets from 1998 oak and faux-oak to white and fabulous, here's the process we used:


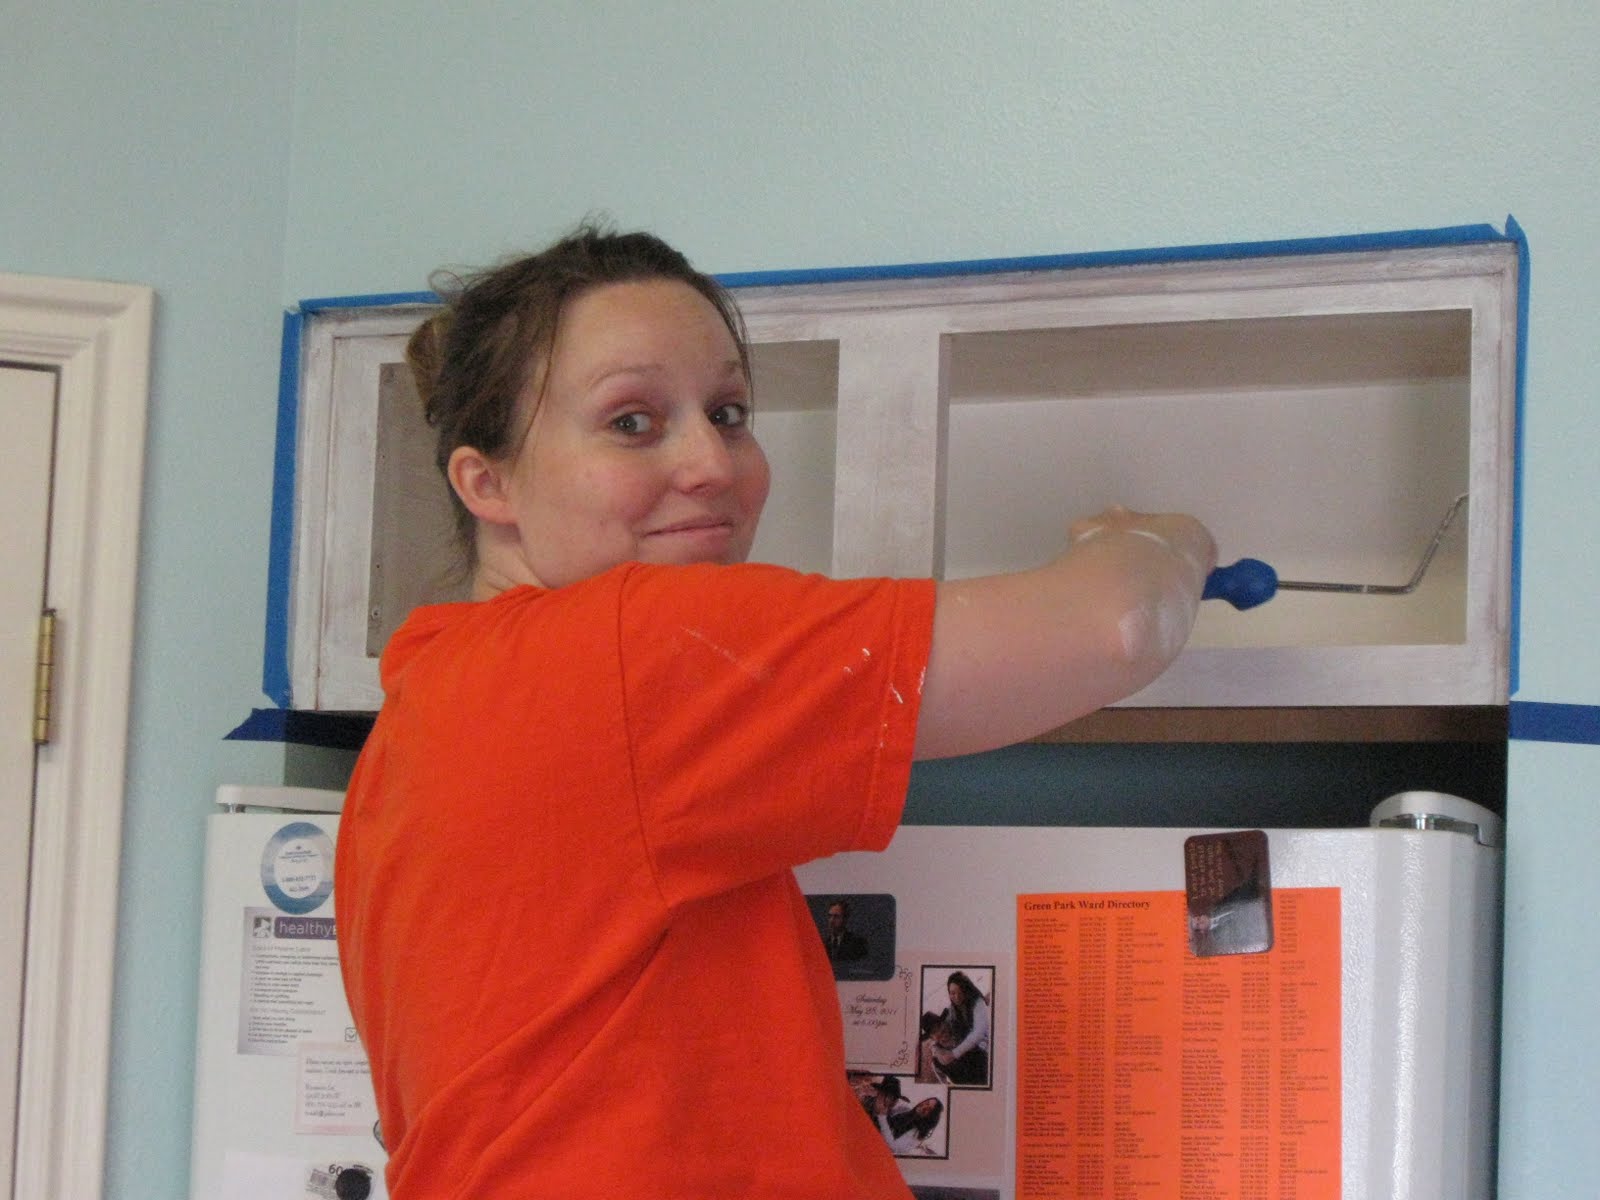
1.  Clean and clean and clean and clean.... After we Kyle emptied the contents of our cabinets, we scrubbed and scrubbed every inch of the cabinetry with hot soapy water (and a toothbrush for the especially bad places).  And then removed the doors and drawers.

2.  Sand and sand some more.  We used a sander for the doors and drawers and sanded all of the cabinet bases by hand.  After a good roughing up, we wiped everything down with a damp cloth.

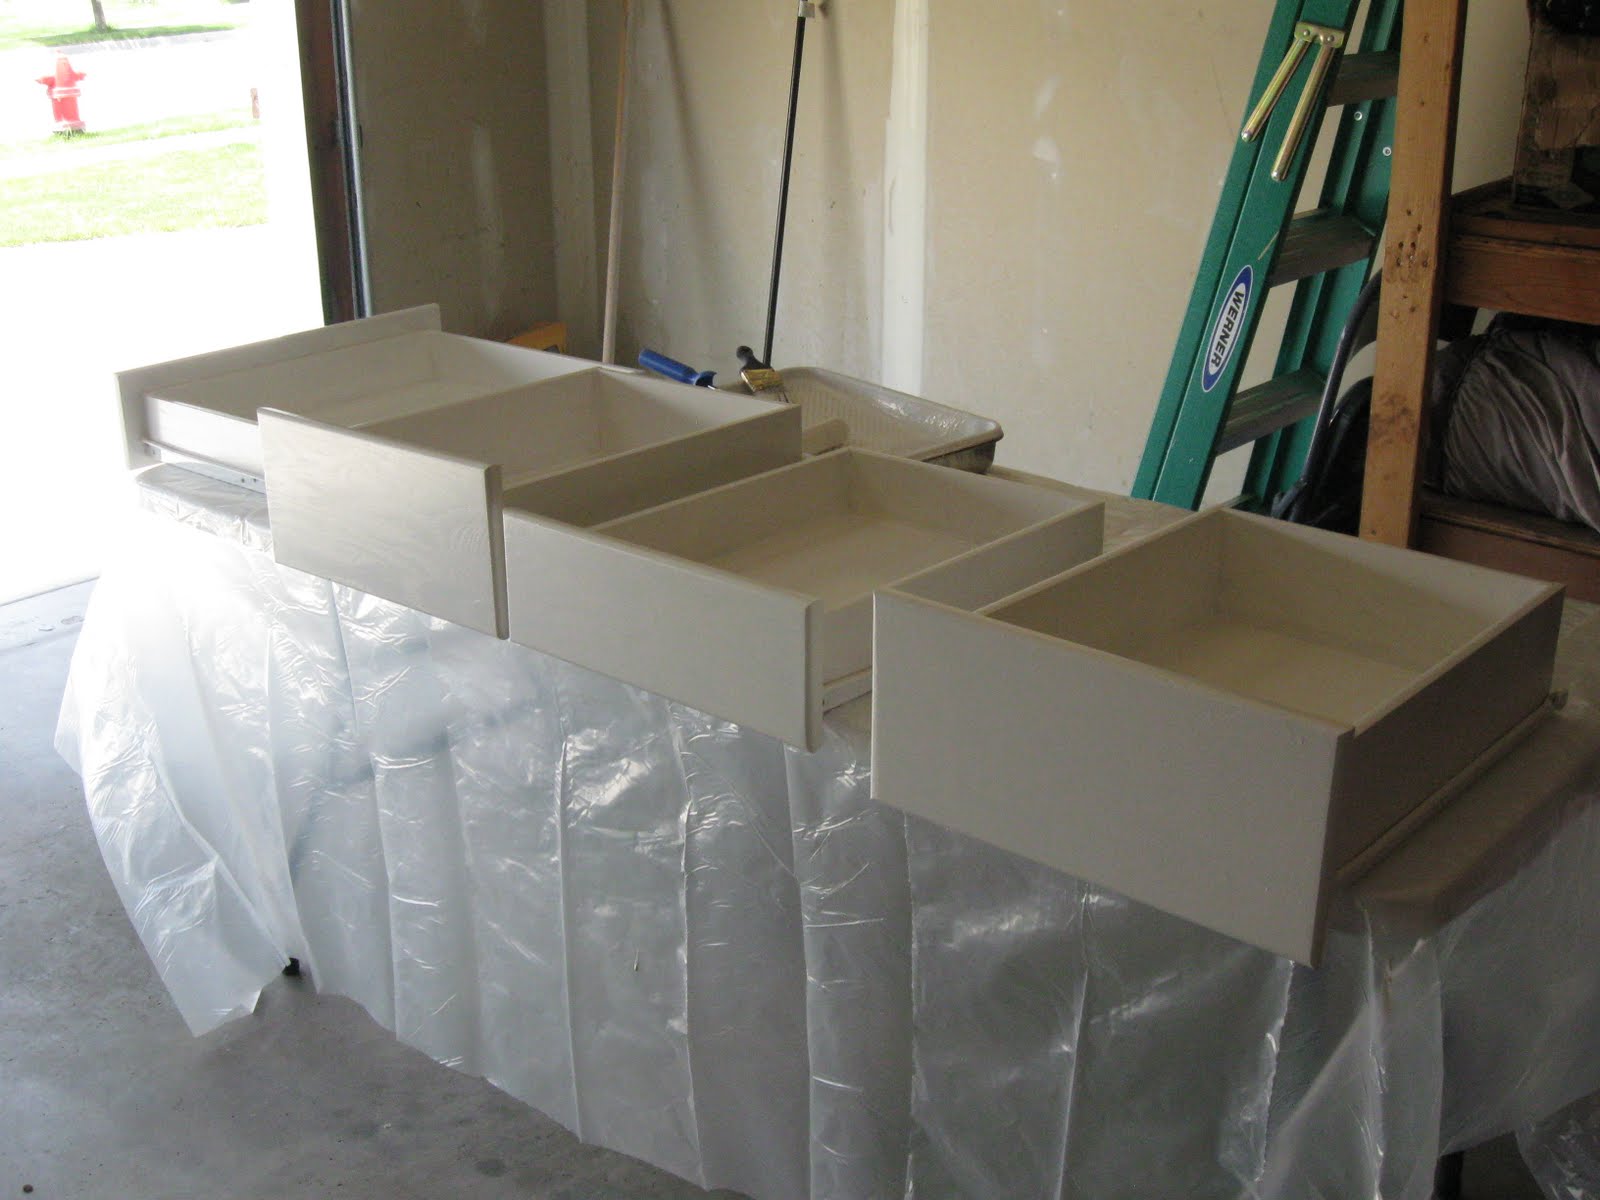
3.  Prime.  We used Zinsser primer because I use it on everything and so far I have loved every minute of it.  This stuff sticks to anything.   I primed the cabinet bases while Kyle primed the doors and drawers in the garage. 

It was about this point that I began cursing myself for wanting to paint the inside of all the cabinets. 
(We made sure we had plenty of ventilation inside: lots of open windows and fans)

4.  Finish coat.  The primer didn't take long to dry, so we were able to move to the finish coat pretty fast.  We applied 2 coats of high gloss Behr awesomeness in Bleached Linen.  I'm really happy we went with the high gloss.  Our kitchen is small and doesn't allow for a lot of natural light, so the added gloss helps to brighten things up.  On top of that, the finish already feels very durable and will hopefully withstand a few years of regular wear and tear.


Again, I did the cabinet bases.


And Kyle did the drawers and doors!


5.  Hardware.  We hadn't really discussed adding knobs to the cabinet doors and drawers until 7 PM Saturday night and we were almost finished with the all the painting.  So we ran to IKEA, dressed in our finest of painting clothes and grabbed some black knobs.  And then things got tricky.  We quickly learned that the screw heads were not strong enough for the power drill and pretty much melted in no time.  Without going into too much detail, let me just say that we broke a drawer in the process.  So we opted for no knobs on the drawers.  And are now one drawer short...

6.  Done!  Kyle hung the doors Sunday night and Monday I re-loaded all the cabinets and drawers (minus one) and cleaned every inch of the kitchen until it shone. 


I love it SO much I can't stop staring.  It's seriously like having a brand new kitchen.
I have plans to add a beadboard backsplash, remove the blinds and add a little cafe curtain for the window. 


A side-by-side of the before and after.
(For some reason we took the after without the lights on so it's a little dark.  Whatever)

I'M IN LOVE!

Wednesday, May 25, 2011

BIG Weekend

For months we have been planning to tackle a BIG project Memorial weekend.
That weekend and this weekend are one and the same.
!
That means we have A LOT of work coming in the next few days.
I am tired already just thinking about it.
And I hope I can be helpful so Kyle doesn't have to do it all himself.
But I have been wanting to do this for the last 13 months.
13 months is a long time to wish for something.
That is like 1.44 pregnancies.
Ugh.
Pregnancy.
I won't get started on baby stuff again because I realize that's about all I talk about anymore.
And I can't quite think about this weekend just yet because as excited as I am.... I'm also afraid I will not be able to keep up.
{heaven help me}
So instead I will think fondly of how I am going to be rescued by a new dishwasher in the very near future (before the long weekend even!).  We have been hand washing dishes for something like 40 days now and that is 40 days and 40 nights I'd like to not do again if I can help it.

The end.

Monday, May 23, 2011

Progress!


We got our new bookshelves painted and on the nursery wall!  I have to say, I really love them.  And whoever thought of using Ikea spice racks as book storage is genius.  (I wish I could say it was me)  We will probably add another set at the bottom, but I have to regain mobility again.  Apparently it only takes minimal effort these days to render my body completely useless. 

I also sewed up a quick crib skirt, I am *this close* to finishing up the baby quilt and I am halfway done with a less sucky ruffled lampshade for my beloved milk glass lamp.  I'd show you now, but I think it's so much better to see them finished, don't you agree?

I'm now 30 weeks pregnant and working on the nursery helps to dissolve the anxieties I have about giving birth in two months.  I will be spending a lot of time in here...


Tuesday, May 10, 2011

Shady Business

Maybe you've been noticing, but sometimes my great ideas don't always go as planned.


Awhile back I saw this ruffled lampshade made from coffee filters and decided it would be the perfect, inexpensive way to revamp the awful shade in the nursery.


I spent 4 days hot gluing 600 coffee filters to the lampshade.  Even Kyle got in on the coffee filter action.  (He is such a good assistant)

And then I got this far and reaized how ridiculously massive the shade had become.  It was already pretty big to begin with, but the coffee filter ruffles added a good 4-5 inches to the diameter of the shade and when I plopped it on the slender lamp base, it looked ridiculous. 


See?  Ridiculous.  Better yet, it didn't even fit in the corner for which it was intended to reside.  So I stopped gluing and contemplated the shade's fate.  And what to do of the naked lamp base?  I had pretty much resigned to forking over $15 for a new shade when I happened upon a like-new condition one at a yard sale for $1.50.  It's a plain, gathered shade, but it's petite and matches the lamp's scale much better, in my opinion. 


The lamp actually fits in its corner now!
I think the lamp is still a little too boring for my taste so I'm contemplating a pom pom fringe and painting the lamp base.  Is it a sin to paint brass?  'Cause I'm pretty sure this thing is brass.  And I'm pretty sure I'm gonna paint it. 
Mom, close your eyes!  (She's a purist)
But now what to do with the behemoth of a half-ruffled lamp shade?
Kyle just laughs and rolls his eyes at my clever suggestions:
1.  Cover the ceiling fan lights with a new ruffled dome shade!
2.  Add a bottom to it and turn it into a storage bin!
3.  A Halloween hat?
4.  Cat toy?

Okay, it's probably just going in the trash.
I never liked that stupid shade in the first place.
I'm kind of striking out on my DIY projects this week.
First the bookshelf and now the lamp?
Pray for me.  I still have a lot of projects to screw up finish.


p.s. do you love the old green arm chair?  it was Kyle's grandma's :)

Monday, May 9, 2011

Something Even Better

I'm a little sad about it, but we've decided to get rid of the $5 bookcase.

Here is my reasoning:
1. We do not really know if it is lead based or not, but since it'd be going in the nursery, we want to be 100% sure everything is safe for the baby.  A home lead test kit costs more than we paid for the bookshelf so it's really not worth it to us to even bother with.
2. It was only $5 so no hard feelings
3. Not having it in the nursery will make for more space in the tiny room
4. One less thing for me to paint
5. I listed it for sale on ksl's classifieds just for fun and within 10 minutes I had a buyer!  That buyer never showed up, but I now have two more vying for the bookshelf and I should have it good and sold this afternoon.  And we'll make a profit! :)

As a further update, I have confirmed that even if I was sanding a lead-infested bookshelf, the limited exposure was not significant enough to cause any harm to me or the fetus. 
(You can breathe easy now, Mom) 

Better yet, we found a book storage solution that we happen to like even better!

Ikea spice racks.
As bookshelves.
It's genius, I tell you.
I wish I could say I came up with it myself.
But I did find it on Pinterest all by myself.
That counts for something, right?
We picked up four over the weekend and I am so excited to get them on the walls!

Tuesday, May 3, 2011

Does this possibly make me a bad parent?

The weather was finally nice enough for me to drag the $5 bookshelf outside for a good sanding and cleaning.  I figured it probably isn't good for a pregnant girl like me to breathe sanding dust so I covered my face with my shirt while I sanded.  (See how health conscious and responsible I am?)

Probably we should just invest in some real masks because trying to keep your shirt over your face and your ill-fitting maternity pants from falling down is made extra difficult when you're also wearing glasses and sanding with both hands.  But I am a multitasker and I don't give up. 

I was surprised (and also a little worried?) to discover that the reddish varnish on the bookshelf came off exceptionally easy.  At which point I started to wonder, "How old is this thing?" and worse yet, "Could this old varnish perhaps be lead based?" 

So I promptly wrapped up my sanding session, sprayed down the beast, and took a shower for good measure.  And then I googled lead-based varnish and my suspicions were somewhat confirmed; there seems to be a good possibility that my great yard sale find contains lead based varnish.  Now I'm nervous about our future plans to put this baby in the nursery. 
Did I get all the varnish off? 
Will a few good coats of primer and paint encapsulate whatever lead based materials may be remaining?
Will it be okay to chew on?  You know, just in case Baby P wants to teethe on a giant bookcase while perusing her kinder library.

I'm afraid to admit our possible health hazard to Internetland in fear that my mother will soon read this and then begin texting me concerned questions about why I was ever sanding in the first place and what am I thinking painting while pregnant?!?
(love you, Mom. don't worry, Kyle has already rebuked me)

Oh the pains of trying to DIY through life.

Just don't even get me started on the moldy kitchen cabinet.

Friday, April 22, 2011

I Need a Twelve Step Program


The joy of being married is that you suddenly have someone watching you 24 hours a day who can point out the strange and annoying things you do.  Because we are with each other pretty much all the time, Kyle notices things about me that I did not ever notice before.

Case in point: I start a lot of projects simultaneously.
Most of which I have yet to finish.

You guys, I think I'm driving him nuts.  Well, okay I know I'm driving him nuts, because he told me so.  I can tell you this because I've realized that he is right (don't tell him I said so!)
And now I am driving me nuts too. 
Pretty much I need to finish some projects. 
Now.

Of course when he first pointed this out, I denied it profusely and justified every 50% complete project.  (I need more supplies!  I need more time!  I'm a multitasker!  It's just how I roll!)
But now that I've had some time to think about it, I am here to hang my head in public shame and come clean about my problem.

My Unfinished Projects:
1. Baby Quilt: needs to be backed and bound
2. Floor Lamp: I need wayyy more coffee filters and another 3 days of hot gluing.  Also, I may need to paint the lamp base (I'm still somewhat undecided on this factor)
3. The Gallery Wall: I have three frames that still have paint on the glass (I just need to scrape it off) that also need pictures inside. And I must finally correct the slightly off-balance issue.
4. $5 Bookshelf: Still sitting in the garage waiting for a good sanding and a clever paint job.
5. Nursery Dresser: It WAS finished once, but then I decided to mess with the knobs.  Now I need to finish the knobs.
6. The Chair:  Uh... the piping has been pinned on this chair for over a year even though all it needs is a little hot glue.
7. Paper wall flower: Needs paint and a home
8. Birdhouse: The first paint job was all wrong and now it needs a new one

This list does not include all the projects I've not officially started but are hanging in the balance, waiting for a makeover: painting a corner shelf, sewing up throw pillows, slip covers here and there, refinishing bedroom furniture......)

Hi, my name is Kourtney and I have project ADD.
Anyone else suffer from this?

Tuesday, April 19, 2011

Sneak Peak

A sneak peak of where virtually all of my at-home time has gone.
200+ coffee filters and several hot glue gun burns later... I'm still only 1/5 of the way finished.
Why do I always do this to myself?

I sure hope I like it in the end...

Monday, March 28, 2011

Serenity Now

There is peace again in my universe and all is right in the world because I have finally mastered the nursery furniture layout.  Is it wrong for me to spend most of my waking hours re-arranging furniture in my mind?  Because I do a lot of that these days.  I draw little floor plans on napkins and receipts whenever a clever idea happens to strike.  I mean, you never know when you might be inspired to put a cabinet in a closet and move a bookshelf behind a chair, and that is exactly the solution I needed.  I feel triumphant!  Victorious!  Relieved!  We finally have a nursery floor-plan!  And I'm pretty sure it's going to be functional!

Truth be told, we picked the very smallest of our rooms to serve as the baby's room.  This only because it is the room that shares a wall with our bedroom and that just seemed like a good idea. 

At first I felt a little panicked that the room was so empty.  We needed furniture! And accessories!  Pronto!

And then all of a sudden we had way too many things and way too few spaces.  It was really the $5 book shelf that threw everything off.  So that's when I had to put a little creative thinking to use.  But now...  now things are just right.  Proportions feel right, spacing is good, and even in the tiny nursery, we managed to fit one Jenny Lind crib, one old rocking chair, one repainted nightstand/dresser, one $5 bookshelf, one vintage arm chair, two lamps, and one old tv-stand-turned-storage-cabinet. 

(do you feel like singing the Twelve Days of Christmas yet?)

Pictures coming soon, I promise.

In the meantime, I will let you in on a few secret projects I have in the works for the nursery.

One butterfly mobile


Four felt dahlias


One ruffled crib skirt


A few fabric buntings


One baby gallery


Two ruffled lampshades


And then there's the lamps to paint, the baby quilt to back, curtains to adjust, and $5 bookshelf to refinish.

Good thing I have 18 more weeks!

Tuesday, March 22, 2011

Spring is for Treasure Hunts


photo by me
It is officially spring and at the Post home that means yard sales!!

I'm a little obsessively proud of our cheap yard sale/thrift store finds.  A woman recently visited our home and complimented this or that thing that we have displayed in the house.  As I proudly exclaimed "Yard sale!" "Thrift store!"  "Free!"  She just stared at me blankly.

I guess not everyone loves the used goods like we do.

But that is okay.  Junk is not for everyone, but it is for us!

So despite the fact I woke up feeling not-so-hot Saturday morning, we went out at 7:30 AM on the hunt for the season's first yard sales.  I had a list of 13 and we made it to 8 in 3 different cities by 10:00 AM.  We only made one purchase.


This vintage book display rack for $5!!! 
The seller explained that it was an old book rack from a public library in Provo.  I loved it even more that it had a story.  (Just another reason why I love vintage stuffs)


We've wanted a display rack for the nursery and have been considering this one at Pottery Barn for $100, but just couldn't justify $100 to display books.   We wanted to go for a display rack over a bookshelf so the titles were visible, and we think it's a little more interesting than your average boxy bookshelf.  Sure our $5 version is a little different than the PB one, but it displays the book covers, it's vintage, and did I mention it was only $5?!?!  Man I love a good find.

As soon as I'm no longer cold medicine dependent, we'll give this book rack a good cleaning and a few coats of paint.  There's just nothing like finding the perfect treasure at a yard sale or thrift store! 

I live for the hunt.